FIAT / DUCATO 244eLearn workshop manual · English · Offline edition
Procedures

5020A12 HEATER CASING - R+R WITH FACIA REMOVED

Engines: 2.0 16V, 2.0 JTD 8V, 2.3 JTD 16V, 2.8 JTD 8V

RemovingManual illustration 20

RefittingManual illustration 21
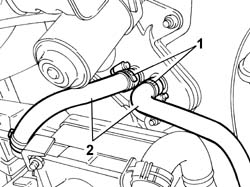
Op. 0010T20 COOLANT CHECK DENSITY AND TOP UP IF NECESSARY1. Remove the retaining bands.2. Disconnect the pipes from the heater tap.
Manual illustration 244004144
Engines: 2.0 16V, 2.0 JTD 8V, 2.3 JTD 16V, 2.8 JTD 8V
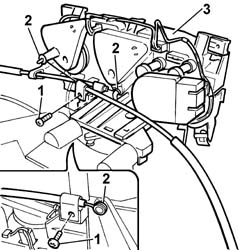
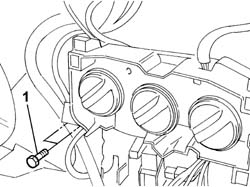
- Mark the control cables.1. Undo the retaining bolts.2. Disconnect the control cables.3. Remove the heater controls support.
Manual illustration 244004145
Engines: 2.0 16V, 2.0 JTD 8V, 2.3 JTD 16V, 2.8 JTD 8V
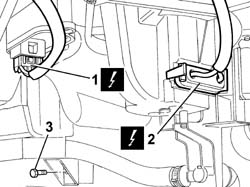
- Undo the bolts fixing the dashboard trim supporting crossmember.1. Disconnect the electrical connection for the fan resistance.
[symbol: EL_COMP 01.jpg]DescriptionConnector
1Passenger compartment air fan adjustment resistanceO030
2. Disconnect the electrical connection for the fan.
[symbol: EL_COMP 02.jpg]DescriptionConnector
2Passenger compartment air fanN085
3. Undo the lower fixing nut.
Manual illustration 244004148
Engines: 2.0 16V, 2.0 JTD 8V, 2.3 JTD 16V, 2.8 JTD 8V
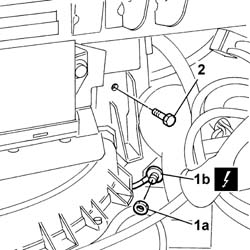
1. Undo the nut (1a) and disconnect the earth (1b).
[symbol: EL_COMP 03.jpg]DescriptionConnector
1bPassenger dashboard earthC020
2. Undo the retaining bolt.
Manual illustration 244004150
Engines: 2.0 16V, 2.0 JTD 8V, 2.3 JTD 16V, 2.8 JTD 8V
1. Undo the retaining bolts.
Manual illustration 244004151
Engines: 2.0 16V, 2.0 JTD 8V, 2.3 JTD 16V, 2.8 JTD 8V
- Open the retaining bands and move the electrical wiring aside.- With the help of a second mechanic, lift up the dashboard trim supporting crossmember.- Remove the heater casing.
Engines: 2.0 16V, 2.0 JTD 8V, 2.3 JTD 16V, 2.8 JTD 8V

RefittingManual illustration 21

RemovingManual illustration 20
- With the help of a second mechanic, lift up the dashboard trim supporting crossmember and place the heater casing in position.- Tighten the bolts fixing the dashboard trim supporting crossmember.- Tighten the bolts and the nut fixing the heater casing.- Refit the electrical connections.
[symbol: EL_COMP 04.jpg]DescriptionConnector
-Passenger compartment air fanN085
[symbol: EL_COMP 05.jpg]DescriptionConnector
-Passenger compartment air fan adjustment resistanceO030
- Place the earth in the wheel arch and tighten the fixing nut.
[symbol: EL_COMP 06.jpg]DescriptionConnector
-Passenger dashboard earthC020
- Position the wiring and secure it using the retaining bands.- Position the heater controls support.- Connect the control cables marked previously and tighten the fixing bolts.- Connect the pipes to the heater tap and secure them using the retaining bands. Op. 0010T20 COOLANT CHECK DENSITY AND TOP UP IF NECESSARY