FIAT / DUCATO 244eLearn workshop manual · English · Offline edition
Procedures

5020A24 HEATER BOX - DISMANTLE AND REBUILD AT BENCH

Engines: 2.0 16V, 2.0 JTD 8V, 2.3 JTD 16V, 2.8 JTD 8V

RemovingManual illustration 20

RefittingManual illustration 21
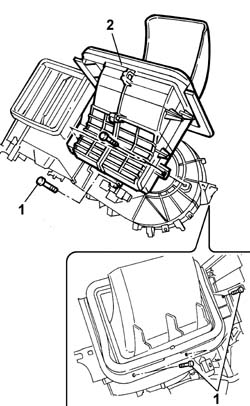
1. Undo the retaining bolts.2. Remove the recirculation air intake unit.
Manual illustration 244004155
Engines: 2.0 16V, 2.0 JTD 8V, 2.3 JTD 16V, 2.8 JTD 8V
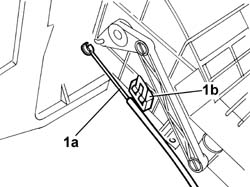
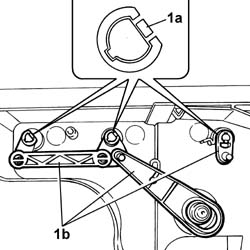
1. Release the control cable (1a) from the spring (1b) and disconnect it from the recirculation air intake.
Manual illustration 244004156
Engines: 2.0 16V, 2.0 JTD 8V, 2.3 JTD 16V, 2.8 JTD 8V
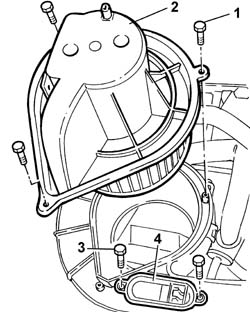
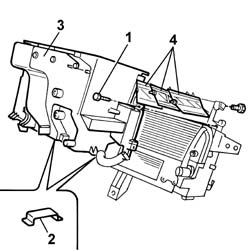
1. Undo the retaining bolts.2. Remove the radiator fan.3. Undo the retaining bolts.4. Remove the heater fan motor resistor.
Manual illustration 244004157
Engines: 2.0 16V, 2.0 JTD 8V, 2.3 JTD 16V, 2.8 JTD 8V
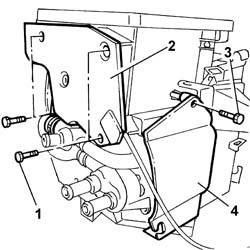
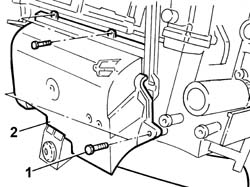
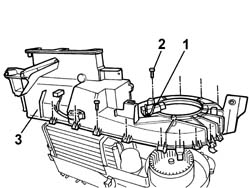
1. Undo the retaining bolts.2. Remove the rear guard.3. Undo the retaining bolt.4. Remove the side guard.
Manual illustration 244004158
Engines: 2.0 16V, 2.0 JTD 8V, 2.3 JTD 16V, 2.8 JTD 8V
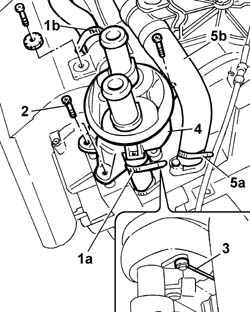
1. Remove the bands (1a) and (1b) retaining the heater radiator supply and return pipes.2. Undo the bolts fixing the tap.- Open the tap control cable retaining spring.3. Disconnect the tap control cable and remove it.4. Disconnect the heater radiator supply and return pipes and remove the tap.5. Remove the band (5a) and remove the flexible pipe complete with connector for bleeding the cooling system (5b).
Manual illustration 244004159
Engines: 2.0 16V, 2.0 JTD 8V, 2.3 JTD 16V, 2.8 JTD 8V
1. Undo the retaining bolts.2. Remove the floor air distribution flap cover.
Manual illustration 244004160
Engines: 2.0 16V, 2.0 JTD 8V, 2.3 JTD 16V, 2.8 JTD 8V
1. Disconnect the linkage using a suitable tool.2. Release the floor air distribution flap and remove it.
Manual illustration 244004161
Engines: 2.0 16V, 2.0 JTD 8V, 2.3 JTD 16V, 2.8 JTD 8V
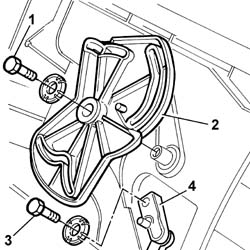
1. Undo the retaining bolt.2. Remove the flap linkage control device.3. Undo the retaining bolt.4. Remove the floor air distribution flap linkage.
Manual illustration 244004162
Engines: 2.0 16V, 2.0 JTD 8V, 2.3 JTD 16V, 2.8 JTD 8V
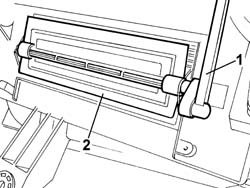
1. Act on the springs (1a) and remove the linkage (1b).
Manual illustration 244004163
Engines: 2.0 16V, 2.0 JTD 8V, 2.3 JTD 16V, 2.8 JTD 8V
- Remove the upper seal using a suitable tool.1. Undo the retaining bolts.2. Remove the metal springs.3. Remove the front upper half casing.4. Remove the flaps.
Manual illustration 244004164
Engines: 2.0 16V, 2.0 JTD 8V, 2.3 JTD 16V, 2.8 JTD 8V
1. Undo the fixing bolt and move the frost thermostat to the side.2. Undo the retaining bolts.3. Remove the rear upper half casing.
Manual illustration 244004165
Engines: 2.0 16V, 2.0 JTD 8V, 2.3 JTD 16V, 2.8 JTD 8V
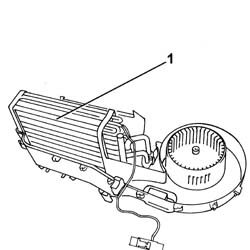
- Disconnect the pipes.1. Remove the heater radiator.
Manual illustration 244004166
Engines: 2.0 16V, 2.0 JTD 8V, 2.3 JTD 16V, 2.8 JTD 8V

RefittingManual illustration 21

RemovingManual illustration 20
- Position the heater radiator and connect the pipes.- Position the rear upper half casing and tighten the fixing bolts.- Position the frost thermostat in the housing in the rear upper half casing and tighten the fixing bolt.- Position the flaps inside the half casings.- Tighten the retaining bolts.- Attach the metal springs.- Fit a new upper seal.- Position the flap linkage and secure it.- Position the floor air distribution flap linkage and tighten the fixing bolt.- Position the flap linkage control device and tighten the fixing bolt.- Position the floor air distribution flap and secure it.- Connect the linkage.- Position the floor air distribution flap cover and tighten the fixing bolt.- Connect the tap control cable and secure it to the fastening spring.- Position the tap and tighten the fixing bolts.- Position the flexible pipe complete with connector for bleeding the cooling system.- Lock the flexible pipe complete with connector for bleeding the cooling system to the heater radiator and to the tap using suitable retaining bands.- Position the side guard and tighten the fixing bolt.- Position the rear guard and tighten the fixing bolts.- Position the heater fan motor resistor and tighten the fixing bolts.- Position the heater fan and tighten the fixing bolts.- Connect the control cable and secure it to the spring.- Position the recirculation air intake unit and tighten the fixing bolts.