Procedures
5020M92 WIRING ON ADDITIONAL HEATER - R.R.
Engines: 2.0 16V, 2.0 JTD 8V, 2.3 JTD 16V, 2.8 JTD 8V
Removing
- Disconnect the negative battery terminal.- Raise the vehicle on the lift.1. Support the weight of the heater unit and loosen the bolts (1a) and the nuts (1b) fixing the independent heater unit mounting bracket.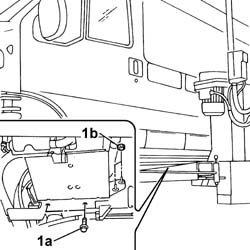
Engines: 2.0 16V, 2.0 JTD 8V, 2.3 JTD 16V, 2.8 JTD 8V
1. Disconnect the electrical connector for the independent heater unit and release it from the mounting bracket.
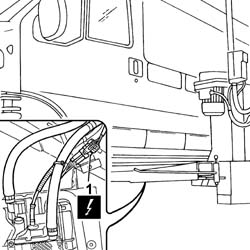
| [symbol: elettrico 01.jpg] | Description | Connector |
|---|---|---|
| 1 | Additional heater control unit | M075 |
Engines: 2.0 16V, 2.0 JTD 8V, 2.3 JTD 16V, 2.8 JTD 8V
1. Disconnect the electrical connections for the wiring from the independent heater.2. Remove the wiring for the independent heater unit.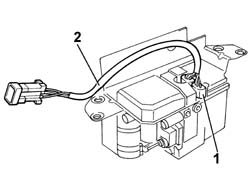
Engines: 2.0 16V, 2.0 JTD 8V, 2.3 JTD 16V, 2.8 JTD 8V
Refitting
- Connect the electrical connectors for the heater unit wiring.- Connect the electrical connector for the heater unit.| [symbol: elettrico 02.jpg] | Description | Connector |
|---|---|---|
| - | Additional heater control unit | M075 |
| [symbol: coppie 01.jpg] | Value - daNm | Fastening | Component | Ø |
|---|---|---|---|---|
| - | 2 | Nut | - | M8 |
| [symbol: coppie 02.jpg] | Value - daNm | Fastening | Component | Ø |
|---|---|---|---|---|
| - | 2 | Bolt | - | M8 |