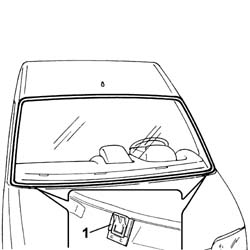
Op.5050B34BRACCIO/I TERGITORE/I DEL TERGICRISTALLO ANTERIORE COMPLETO DI SPATOLA - S.R.Op.7210E22S.R. RIVESTIMENTO BASE PARABREZZA1. Remove the windscreen glass retaining block.2. Remove the windscreen perimeter seal.
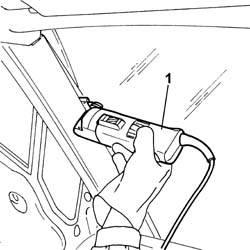
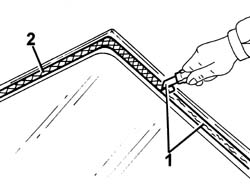
- Apply adhesive tape to protect the edges of the bodywork and along the side and upper perimeters of the windscreen housing.1. Use a vibrating knife with a suitable blade to cut the sealant strip.
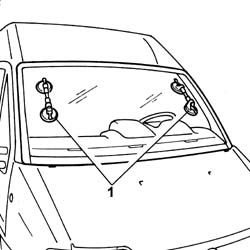
1. After cutting round the entire sealant strip, apply suction pads to the windscreen and then, with the assistance of a second mechanic, remove the windscreen and rest it on a support stand.
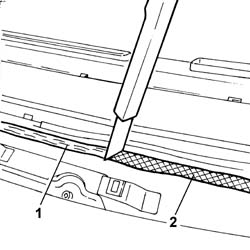
1. Using suitable equipment, cut and level the bead of sealant in the windscreen housing leaving a thickness of between 0.25 and 1 mm, taking care not to scratch the paintwork.2. Thoroughly clean the windscreen housing using an air jet and degrease fully using heptane.- When bonding, 60 minutes after the bead of sealant has been cut and levelled, the surface of the actual sealant must be treated using the special activating product and it is necessary to wait for 15 minutes before fitting the windscreen.
1. Using suitable equipment, cut and level the bead of sealant in the windscreen housing leaving a thickness of between 0.25 and 1 mm, taking care not to scratch the glass.2. Clean the perimeter of the serigraphed area of the windscreen thoroughly with compressed air and degrease it using heptane.
- Check that the glass is not damaged.- When bonding, 60 minutes after the bead of sealant has been cut and levelled, the surface of the actual sealant must be treated using the special activating product and it is necessary to wait for 15 minutes before fitting the windscreen.
[symbol: prodotti 04.jpg]
Description
Q.ty
Component
Type
Classification
-
-
-
-
Sealant
Primer
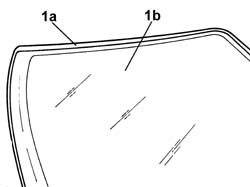
1. Fit the perimeter seal (1a) in its seat on the windscreen glass (1b).
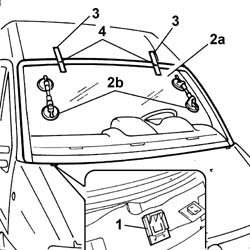
1. Fit the retaining pads in their seat and renew the double-sided adhesive tape.- Remove the adhesive tape from the edges of the bodywork and along the side and upper perimeters of the windscreen housing.2. Carry out a test fitting and centre the windscreen perfectly with the aid of the sucker handles and a second operator.3. When the windscreen has been centered, mark the position of the windscreen in relation to the housing using strips of adhesive tape.4. Cut the strips of adhesive tape at the point where the glass joins the panel to provide locating reference marks and remove the windscreen with the aid of a second operator. Rest it on an appropriate support stand.
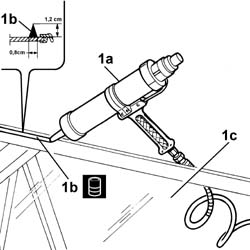
1. Use an air gun (1a) to extrude a sealant strip (1b) around the entire perimeter of the windscreen (1c) following the track of the sealant cut through for removal.
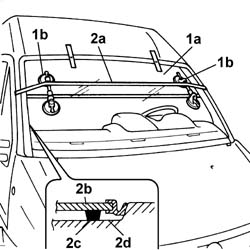
1. With the aid of a second operator, position windscreen (1a) in its seat using sucker handles (1b).2. Position the belt (2a), as illustrated, and tension it so that even pressure is exerted on the entire windscreen to ensure that the matching between the glass (2b), sealant (2c) and windscreen housing (2d) is correct.